
PageMod PageMod 页魔

Tutorial · Playground

Prerequisite: PageMod extension installed. This page includes an ad-blocking exercise — if it fails to load properly, temporarily disable your installed ad-blockers.

1

Auto-refresh until a status completes

Simulates a background task: click "Simulate run" to start the countdown, and the status flips from "In Progress" to "Done" after 10 seconds. The AI refreshes every 2 seconds to poll, then stops and sends a browser notification.

Experiment

Task status

Loading
Steps
  1. 1

    Send the prompt below to the AI — it handles the rest. Then go back and refresh to see the result

    Refresh this page every 2 seconds and stop once the status in the first experiment area is "Done", then send a browser notification.

Verify the results
  • Click "Simulate run" to start the countdown, then refresh the page manually to begin the test

  • The AI refreshes the page until the status becomes "Done", then stops and sends a browser notification
2

Hide ads

The experiment area loads the real ads from your page (for the demo). The AI analyzes the ad signatures and hides them all.

Experiment
Steps
  1. 1

    Send the prompt below to the AI — it handles the rest. Then go back and refresh to see the result

    Hide all the ads in the experiment area on this page, leaving no empty gaps.

Verify the results
  • The AI analyzes the real ad signatures in the experiment area and hides every matching ad

  • Check the experiment: every ad should be gone with no empty gaps

3

Auto-fill a form & click

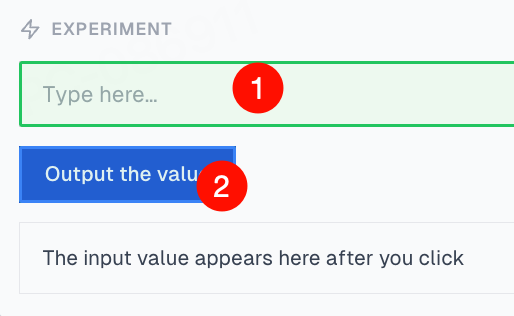
The experiment has an input and a button. The AI fills the input and clicks the button; the value appears below.

Experiment
The input value appears here after you click
Steps
  1. 1

    Activate the pick tool and select the input and button in the experiment area

    Illustration Illustration
  2. 2

    Send the prompt below to the AI — it handles the rest. Then go back and refresh to see the result

    Fill the input in the experiment area with "Hello, PageMod" and click the button next to it.

Verify the results
  • The AI fills the input and clicks the button; the value appears below

4

Monitor, analyze & replay requests

The experiment has a "Send request" button. The AI listens with the network monitor tool, analyzes the request, and writes a script to add a "ReSend" button next to the "Send request" button that sends the same request when clicked, and outputs the response into the area below.

Experiment
The API response appears here after you click
Steps
  1. 1

    Send the prompt below to the AI — it handles the rest. Then go back and refresh to see the result

    First use the network monitor tool to listen, then analyze the request and finish the script to add a "ReSend" button next to the "Send request" button that sends the exact same request when clicked, and outputs the response into the area below.

  2. 2

    Once monitoring is on, click the "Send request" button to record the request

  3. 3

    After recording, the AI analyzes it and writes the code — then refresh the page

Verify the results
  • Click the "ReSend" button and check that the request is re-sent

5

Download a video

The experiment has a sample video. The AI finds its real URL and adds a "Download video" button to the page.

Experiment

Sample video · The AI finds its URL and adds a download button

Steps
  1. 1

    Send the prompt below to the AI — it handles the rest. Then go back and refresh to see the result

    Download the video playing in the experiment area and add a download button to the page.

Verify the results
  • The AI finds the real URL of the video in the experiment and adds a "Download video" button

  • Click the button and the video downloads to your device

6

Dark / Light mode toggle

Add a dark mode switch to the site with a floating button at the bottom-left — one click toggles between light and dark. Great for late-night browsing and reading.

Steps
  1. 1

    Send the prompt below to the AI — it handles the rest. Then go back and refresh to see the result

    Add a dark mode to this site with a floating toggle button at the bottom-left to switch between dark and light.

Verify the results
  • The AI adds a floating button at the bottom-left that toggles dark / light

  • Dark mode applies to the whole page and the choice is remembered

7

Use an image as background

Replace the experiment card's background with an image you provide. Drag the image into the chat, pick the card area, and let the AI do the rest.

Experiment

Image background card

After running the prompt, the AI replaces this card's background with your image.

Steps
  1. 1

    Drag the image into the chat

  2. 2

    Pick the card area

  3. 3

    Send the prompt below to the AI — it handles the rest. Then go back and refresh to see the result

    Use the image as the background of the card area in cover mode.

Verify the results
  • After refreshing, the card background is the uploaded image

8

Image → Prompt (drag & drop)

Drop a design mockup or webpage screenshot onto the floating button — the AI reads the image and reverse-engineers the prompt to recreate it.

Experiment
Sample design Sample design

Drag this image onto the floating button at the bottom-left of the page — the AI reverse-engineers a prompt for it

Steps
  1. 1

    Send the prompt below to the AI — it handles the rest. Then go back and refresh to see the result

    Add a floating button at the bottom-left of the page. Drag the page image onto it — the LLM reads the image as base64, reverse-engineers a prompt, shows progress, and displays the prompt with a copy button when done. LLM config: baseurl: <your baseurl>, apiKey: <your apiKey>, model: <your model name>

  2. 2

    Use a vision-capable LLM (one that understands images) and fill in baseurl, apiKey, model

Verify the results
  • Drag an image onto the floating button and the LLM reverse-engineers it successfully